


Setting up a Windows environment with Android Studio to obtain a rooted Android Virtual Device (AVD) with a working Google Play Store on latest Android (API 36). Using Magisk and a module to install Burpsuite's certificate into the Android's system trust store to enable HTTPs traffic interception.
Introduction
Mobile applications gained popularity over the last few years, especially when businesses adapted the principle of "mobile first". Therefore, securing those mobile applications became an upcoming task of penetration testers as well as security enthusiasts, bug bounty hunters and analysts in general.
To analyze Android mobile applications, two common ways exist:
- Using a physical Android device
- Using a virtualized Android device
Although having a physical Android device is great and may bring some advantages, the benefits of using virtualization is even bigger. As an example, to just name a few advantages of virtualizing an Android device:
- Performance; hardware specifications can be adjusted on the fly
- Reproducibility; lab environment can be spawned consistently on nearly any hardware
- Cost; no need to actually purchase real hardware
- Upgradability; no deprecating physical hardware that affects the maximal supported Android version in the future
- Flexibility; you can easily spawn up a new Android Virtual Device with a different target Android version or hardware model
Due to the aforementioned benefits of using virtualization, this blog post will focus on a virtualized lab environment. In order to virtualize an Android device, three common ways exist that I am aware of:
When comparing the maximum Android target version as well as the performance of those two virtualization platforms, I would highly recommend using Android Studio. It is much faster than Genymotion and supports all latest Android versions as well as native Google Play Store support.
If you use Genymotion's PaaS or SaaS product, the latest Android version with support for Google Play Store may also be available. Moreover, Genymotion comes with pre-rooted AVDs with native Play Store support.
Correlium is also great but not free.
Android Studio on Windows
For this blog post we will install and use Android Studio on Windows in order to spawn our Android lab environment for penetration tests. Afterwards, we will root the AVD with an automated rootAVD.bat script from GitHub and use Magisk as well as a Magisk module called TrustedUserCertificates to import BurpSuite's certificate into the Android System trust store for HTTPS interception.
Installation of Android Studio
The installation of Android Studio on Windows is straight-forward. Just download the Android studio installation binary from the regular website and follow the installation instructions.
Creating an AVD
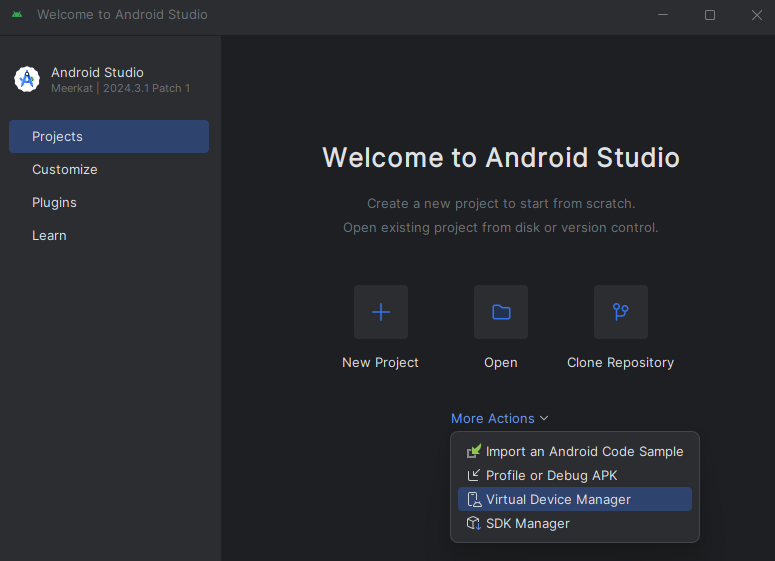
After successful installation of Android Studio, it either already started automatically or you can now proceed starting it manually. Upon startup, you'll be greeted by a welcome page and have the choice to create or open a new project.
In our case however, we will use the option More Actions > Virtual Device Manager to bring up a new window in order to create our Android Virtual Device (AVD).
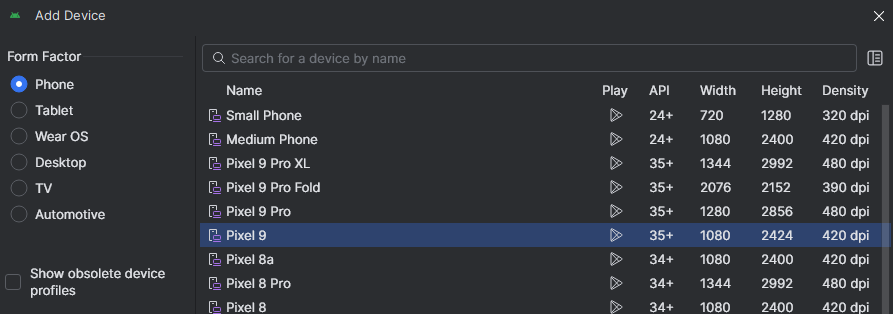
In the newly spawned window we can now choose our Android model as well as the target Android version.
During the time of writing of this blog post (2022), we once used Google Pixel 4 as Android model and the Android version TiramisuPrivacySandbox (API level 34).
Nowadays (2025), you should select Pixel 9 as device model and just the latest Android version suggested (API level 36). As an example, we used Google Play Intel x68_64 Atom System Image.
When selecting an Android model with auto support for the Google Play Store, you won't obtain automatic root access to the Android OS. We will manually root the AVD via an automated script. So you'll obtain the benefits of having a rooted virtualized device as well as a working Play Store.
However, all Android Studio AVDs come natively with a read-only filesystem. So you cannot just copy a certificate into the SYSTEM trust store. You have to re-mount the filesystem as writeable first. Scroll to the end of this blog post to find commands to fix the issue.
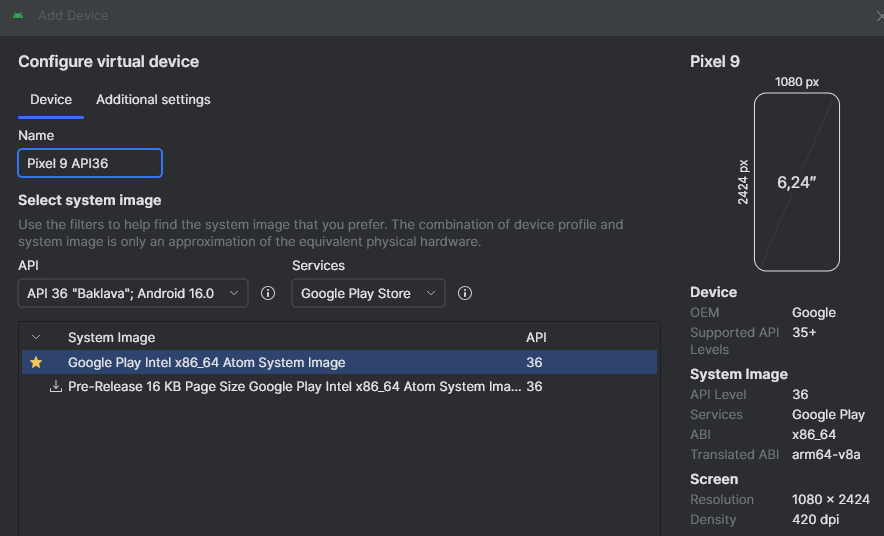
Finally, we can assign a name to our newly created AVD and optionally modify some settings of the virtualized device. In our case, we will name our AVD Pixel 9 API36 and just click on Finish.
Rooting an AVD
To be able to intercept encrypted HTTPS traffic, we must gain root administrative access on our AVD. This is necessary for all Android versions above Android 7.1 since we must install our intercepting proxy's certificate into the SYSTEM trust store.
To gain root access to our previously created Android Virtual Device (AVD) in Android Studio, we can utilize a great community script on GitHub called rootAVD. The script automatically detects our running AVD and executes some necessary tasks in order to root the device and install the Magisk application.
Prerequisites
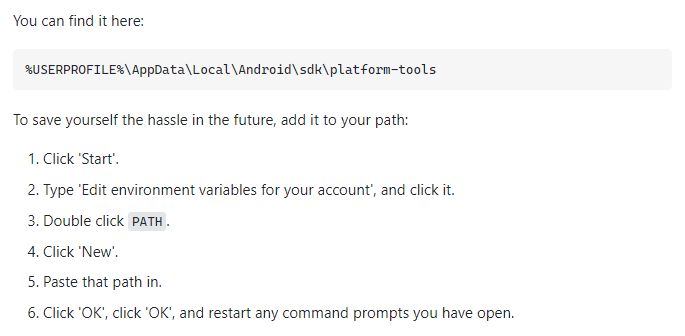
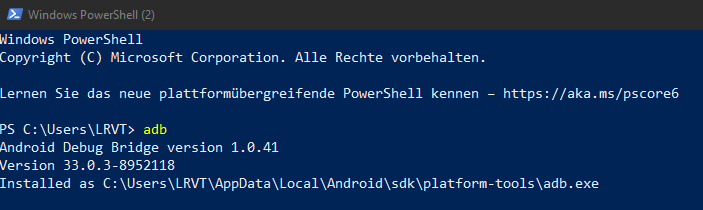
Since the script heavily depends on the adb.exe binary to communicate with our AVD, we will have to ensure that the binary is installed and present on Windows. Furthermore, to easily access the binary, we will adjust the PATH environment variable on Windows.
Please consult the following StackOverflow answer and put the following two paths as new system-wide environment variables in Windows:
%USERPROFILE%\AppData\Local\Android\sdk\platform-tools%USERPROFILE%\AppData\Local\Android\Sdk\emulator
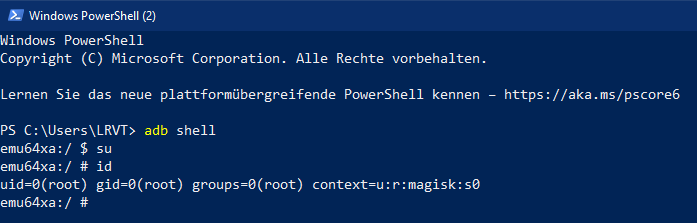
Confirm that the added path works by spawning a new PowerShell terminal window and executing the command adb as follows:
Starting the Rooting Process
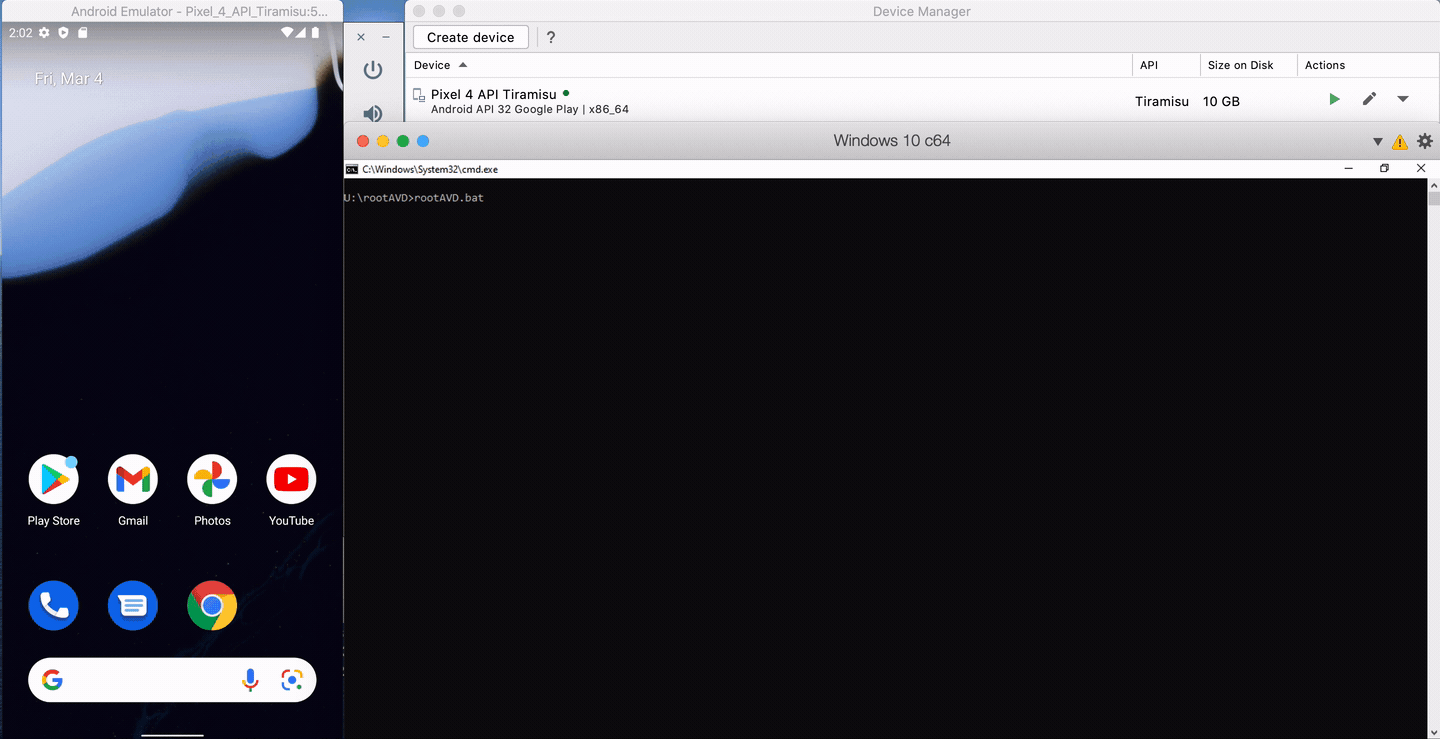
The process of rooting an Android Virtual Device can be summarized as follows:
- Start the Android Virtual Device via Android Studio's
Virtual Device Manager - Download the rootAVD repo from GitHub
- Execute the rootAVD.bat script by using Windows'
cmd.exe
cmd.exe. Do not use PowerShell or Windows Terminal since this may not work.Ensure that your AVD is running before executing the rootAVD.bat script!
# download rootAVD script from GitHub
git clone https://github.com/newbit1/rootAVD

# chdir into the scirpt's directory
cd rootAVD

# list AVDs to update the upcoming script's output
# this will print the correct command for your target AVD version
rootAVD.bat ListAllAVDs

# root the AVD
rootAVD.bat system-images\android-36\google_apis_playstore\x86_64\ramdisk.img
Commands to root an Android Virtual Device
Your AVD will be automatically terminated when the rootAVD.bat script finishes.
Restart your AVD manually within Android Studio and confirm that the Magisk application was installed onto the AVD.
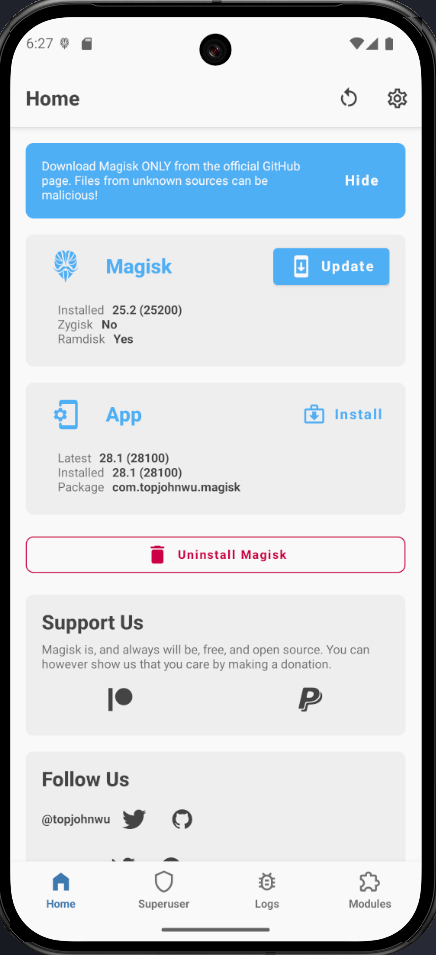
Update button to automatically install the latest version. Also follow the Magisk notifications to install/update the app and run additional things to ensure a smooth usage.
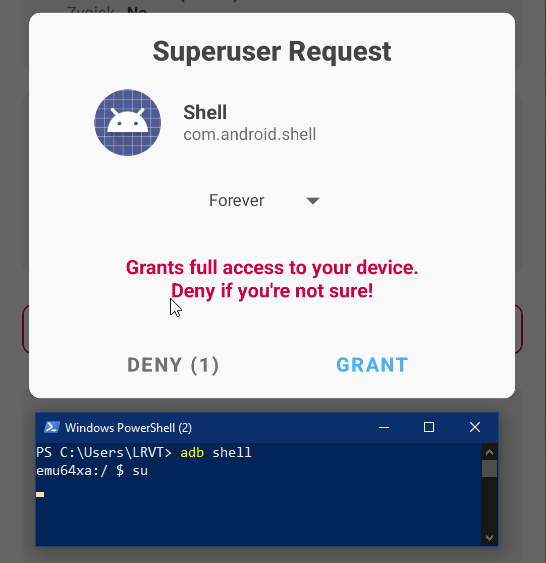
You can also optionally spawn an ADB shell and issue the su command to gain root access. You will receive a notification in the Magisk Android app to approve and grant root access. You may want to use PowerShell here with the correct PATH variables previously set to use the adb.exe binary.
Remote ADB Shell
If you want to access your newly rooted Android Studio AVD from another computer, for example a developer machine running Ubuntu or a Kali Linux VM, you will have to forward the TCP port 5555 running on Windows on 127.0.0.1.
To do so, we can use SSH remote port forwarding. Ensure that the remote machine, from which you want to obtain an ADB shell to your AVD on Windows, is correctly running an SSH service. Then, establish an SSH connection from Windows and forward the locally running TCP port of ADB.
ssh -R 5555:127.0.0.1:5555 <user>@<kali-IP>Native SSH command on Windows for Remote SSH Port Forwarding
Afterwards, the TCP/5555 port was successfully forwarded to the remote machine (e.g. Kali Linux). Then access the remote machine and execute the following commands:
# verify that the forwarded 5555 port is available
netstat -tulpn

# kill local adb server
adb kill-server

# list available devices
adb devices

# connect to remote AVD
# Note: you must confirm the usb debugging popup in your AVD
adb connect 127.0.0.1:5555
adb -s 127.0.0.1:5555 shell
Establishing an ADB shell from a remote machine
Intercepting SSL Network Traffic
Upon rooting our Android Virtual Device, we can now go ahead and configure the AVD in order to intercept SSL network traffic. This consists of installing Burpsuite's SSL certificate into Android's SYSTEM trust store as well as activating the HTTP proxy.
Installing BurpSuite's Certificate
As previously outlined, in order to intercept SSL traffic we must install our intercepting proxy's certificate into the SYSTEM trust store of the AVD. Since Android Studio maps the /system path of AVDs as read-only natively, which cannot be bypassed or remounted as writable due to using a production image with Google Play Support, we will use a Magisk plugin called TrustedUserCertificates available on GitHub.
Just download the ZIP file from Github Releases and drag-n-drop the archive into the running AVD. Afterwards, open Magisk > Modules and select the archive file from /sdcard/Downloads/<release-name>.zip. Magisk will automatically install the module.
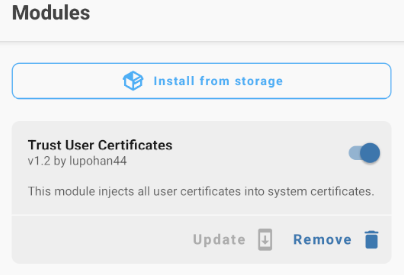
This module will automatically copy all installed certificates of the USER trust store into the privileged SYSTEM trust store when an AVD reboots. Therefore, we have to install BurpSuite's certificate first into the USER trust store and then issue an AVD reboot. Please follow the procedure outlined by PowerSwigger to install the certificate.
Basically export the certificate as .DER format and drag-n-drop the certificate into the AVD.
Afterwards, go to Settings > Security > Certificates > Install a certificate from SD card and install it into the regular USER trust store, which does not require root permissions. Modern Android versions may locate these settings at Security & privacy > More security & privacy > Encryption & credentials.
9a5ba575.0 though. Just drag and drop the cert into the AVD window and install via system settings from sd-card.Upon installing the certificate into the USER trust store and rebooting the AVD, the certificate will be automatically installed into the SYSTEM trust store by the TrustedUserCertificates Magisk plugin. This is an easier solution than trying to remap an AVD's read-only filesystem to be writable.
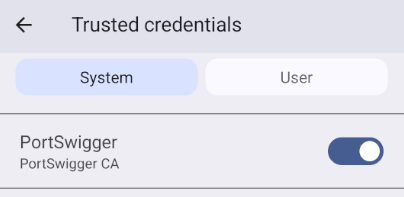
Confirm certificate installation by visiting your Android's system trust store:
Configuring the HTTP Proxy
With a rooted AVD as well as Burpsuite's certificate in Android's SYSTEM trust store, we are now able to intercept SSL network traffic of Android mobile applications.
Install Play Store App
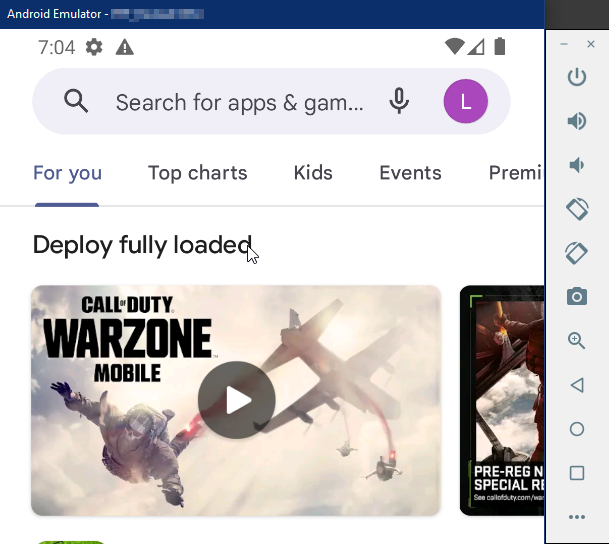
Our to be intercepted mobile app can be easily installed from the regular Google Play Store, which is natively supported when a correct Android model was chosen previously. Just open the Play Store, log in and install your target application.
Start AVD with HTTP Proxy
In order to intercept traffic, we must configure our AVD to use an HTTP proxy. This is historically done by modifying the Wi-Fi configuration within Android and defining a static IP configuration. However, we will utilize a more convenient way by re-spawning our AVD with PowerShell and a specific proxy CMD flag.
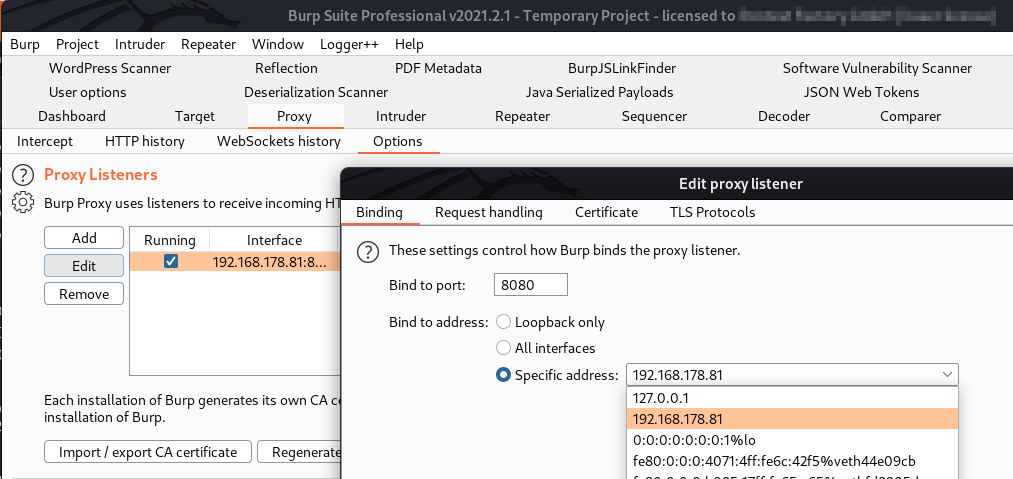
First, ensure that your BurpSuite intercepting proxy is running. It should be listening on a reachable LAN IP address, which you can configure at Proxy > Options > Edit within BurpSuite.
Afterwards, terminate your AVD and restart it by using the following PowerShell command:
# change directory
cd "C:\Users\$env:username\AppData\Local\Android\Sdk\emulator"

# list avd names
.\emulator.exe -list-avds

# run avd with proxy settings
.\emulator.exe -http-proxy <PROXY-IP>:8080 -avd <AVD-NAME>
Starting an AVD with an HTTP proxy
WARNING | Could not connect to proxy at :8080: timed out !You can fix the issue by downgrading the Android emulator exe to a working release. Working versions are
32.1.12 (tested in 2022) and 35.4.9.0 (tested in 2025). You may download from the release archive page.Now you'll be able to intercept HTTPS traffic of any of your installed Android mobile applications.
Certificate Transparency warning when browsing HTTPS websites although the certificate was installed in the USER and SYSTEM trust store of Android.However, intercepting network traffic of Android mobile applications works just fine - as long as the app is not based on the Google Chrome v99+ browser engine. As a fix, install Firefox browser and try to open or browse links there.
The issue is discussed in PortSwigger's forum here. A potential fix was outlined here https://httptoolkit.com/blog/chrome-android-certificate-transparency/.
Bypass Root Detection and SSL Pinning
Some Android applications implement security features like root detection, SSL pinning and TLS verification. In these cases, the network communication cannot be easily intercepted via an HTTP proxy configuration like Burpsuite.
Nonetheless, the hacking community got your back.
We can use free and open-source tooling like frida and objection to manipulate the runtime environment of Android mobile applications and modify or bypass selected client-side security controls during authorized security testing.
Frida is a dynamic instrumentation toolkit that allows testers to inspect and modify an application while it is running. It injects a JavaScript-based agent into the target process and exposes APIs to interact with native code, Java classes, Objective-C objects, memory, function calls, and runtime behavior. On Android, Frida is commonly used together with a Frida server running on the device or emulator.


Install Frida Server on AVD
In order to use the full feature set of Frida, one has to install and run Frida-Server on the virtualized Android device.
To do so, we can use the following Magisk plugin:

Just head to the release section of the repository, download the ZIP file and drag-n-drop it into the Magisk Android app running on your AVD. After installation, reboot the AVD and frida-server will run on boot as root.
Install Frida on Kali Linux
Head to your testing machine, from which authorized security testing will occur and install frida as well as objection:
# create virtual environment
virtualenv venv

# activate virtual environment
source ./venv/bin/activate

# install frida and objection
pip3 install frida-tools
pip3 install objection
Bypass Root Detection and SSL Pinning
Once frida is installed on your testing machine and frida-server runs on your AVD, you can start bypassing client-side security mitigations like root detection, SSL pinning, TLS verification and more.
May read this section again.
Then, you can make use of frida commands and scripts:
# use frida to list running apps
frida-ps -Ua

# bypass root detection
frida -U --codeshare ub3rsick/rootbeer-root-detection-bypass -n <process>

# bypass SSL pinning
frida -U --codeshare Q0120S/bypass-ssl-pinning -n <process>

# bypass TLS verification for flutter apps
frida -U --codeshare TheDauntless/disable-flutter-tls-v1 -n <process>

# run your own javascript gadget
frida -U -n <process> -l ./deeplink_trace.js

# use objection to analyze the Android app
objection -n <appname> start
Conclusion
By using Android Studio on Windows and leveraging a very nice script to root an Android Virtual Device (AVD) in an automated manner, we obtain Magisk, full root access and a generally modern lab environment for testing Android applications. Obtaining an AVD with the latest Android version, a functioning Google Play Store and full root access is no unsolved problem anymore.
Special thanks to newbit1 for providing such a brilliant automation script for rooting AVDs. I would also like to thank PortSwigger for developing and maintaining Burp Suite, which, in my opinion, is the best intercepting proxy available. Finally, many thanks to the developers of Frida and Objection.
I hope you find my blog post useful.
Cheers!
Troubleshooting
During the setup of a rooted AVD, you may experience unexpected obstacles, bugs or problems. During my tests, I noticed the following inconvenience, which I'd like to outline before you have to troubleshoot.
Fixing a Read-Only AVD Filesystem
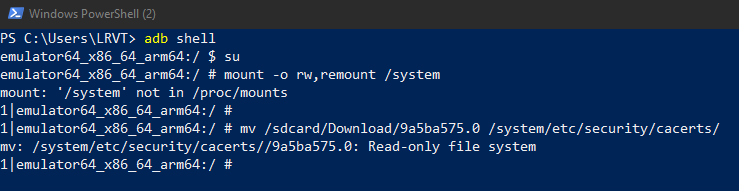
If you find yourself in a scenario, where the AVD's filesystem reports back as Read-only file system or mount: '/system' not in /proc/mounts, use the following commands to fix the issues.
This will usually come up, if you have a pre-rooted AVD with no PlayStore and want to actively modify the filesystem (e.g. copying an SSL certificate into the SYSTEM trust store at /system/etc/security/cacerts/).
# start your AVD with writable filesystem
cd "C:\Users\$env:username\AppData\Local\Android\Sdk\emulator"
.\emulator.exe -writable-system -avd <AVD-NAME>

adb root
adb remount
adb shell avbctl disable-verification
adb shell disable-verity
adb shell reboot
# AVD will reboot and adb shell will disconnect

# proceed with the following after successful AVD reboot
adb root
adb shell

# inside the adb shell
su
# remount system path as writable
mount -o rw,remount /system
# copy burpsuite cert from /sdcard into system path
mv /sdcard/Download/9a5ba575.0 /system/etc/security/cacerts/
# adjust permissions
chmod 644 /system/etc/security/cacerts/9a5ba575.0
# remount filesystem as read-only
mount -o ro,remount /system
Optional cmdlets to fix read-only AVD filesystem


Discussion