


In todays blog post I will guide you through setting up a secure and fast IKEv2 docker container based on Libreswan that will allow you to use native Microsoft Windows board tools to connect securely to your selfhosted server, company or private LAN network.
Introduction
IKEv2 is a widely used VPN protocol known for its enhanced security features compared to its predecessor, IKEv1. Moreover, compared to other VPN solutions like OpenVPN or WireGuard, it is not dependent on mandatory client VPN programs that must be installed to connect to a VPN server.
In short, IKEv2 provides the following advantages:
- Robust Security: IKEv2 uses a more secure "initiator-responder" mode, avoiding the vulnerabilities associated with the insecure aggressive mode used in IKEv1.
- Modern Cryptographic Algorithms: IKEv2 supports modern cryptographic algorithms like AES and SHA-256, providing a strong encryption and authentication for secure data transmission.
- Seamless Mobile Network Support: IKEv2 is designed to work smoothly with mobile networks, allowing automatic reconnection during network changes without interrupting the VPN connection.
- Built-in VPN Functionality: Unlike other VPN protocols like OpenVPN or WireGuard, IKEv2 is natively supported by many operating systems and does not require a third-party VPN client installation.
- Efficient Containerization: IKEv2 can be easily containerized using Docker, providing a scalable and efficient way to deploy and manage VPN services in a containerized environment.
- Strong Authentication: IKEv2 supports various methods of authentication, including certificate-based authentication, providing an additional layer of security for VPN connections.
- Open-Source: As we actively rely on Libreswan, we use a free software implementation of the most widely supported and standardized VPN protocol using "IPsec" and "IKE". Therefore, no proprietary things from Microsoft or Cisco will be in use.
Docker Setup
IKEv2 can be easily set up as a containerized VPN service. Thanks to hwdsl2 and the brilliant GitHub project docker-ipsec-vpn-server, the actual setup is really easy.
Feel free to use my simplified Docker Compose project files:
 Haxxnet
The docker-compose.yml file is intuitive and the official GitHub project's documentation is great. In short, you can use the following, shortened Docker Compose YAML file to setup the containerized IKEv2 service:
version: '3'

services:
  vpn:
    image: hwdsl2/ipsec-vpn-server
    hostname: ipsec-vpn-server
    container_name: ipsec-vpn-server
    environment:
      - VPN_DNS_SRV1=1.1.1.1 # optionally use custom primary dns server; default is Google DNS
      - VPN_DNS_SRV2=1.0.0.1 # optionally use custom secondary dns server; default is Google DNS
      - VPN_PROTECT_CONFIG=yes # optionally protect client config files using a random password
      - VPN_IKEV2_ONLY=yes # disable both IPsec/L2TP and IPsec/XAuth modes; only use IKEv2
    restart: always
    ports:
      - "500:500/udp"
      - "4500:4500/udp"
    privileged: true
    volumes:
      -  ${DOCKER_VOLUME_STORAGE:-/mnt/docker-volumes}/ipsec-vpn-server/data:/etc/ipsec.d # required to enable IKEv2
- /lib/modules:/lib/modules:ro # required to pass kernel modulesAfter adjusting the above compose file to your needs, you can spawn up the Docker IKEv2 container with the following command:
docker compose up -dAs we've advised the container to automatically protect our VPN certificate file with a randomly chosen password (see environment variable VPN_PROTECT_CONFIG), we now have to obtain this secret passphrase to later unlock the certificate file. This can be easily done by inspecting the Docker container logs via:
docker logs ipsec-vpn-serverExporting VPN
Upon starting our newly created Docker container, the container will automatically create an IKEv2 certificate file for us. As the IKEv2 service is containerized, the certificate file will only exist within the Docker container itself.
Nonetheless, we can easily export the file from the container onto our server by the following command:
docker cp ipsec-vpn-server:/etc/ipsec.d/vpnclient.p12 ./Afterwards, transfer the vpnclient.p12 file securely onto your Windows client.
Importing VPN
After having obtained the IKEv2 certificate as well as the auto-generated password for it via Docker container logs, we are now ready to import the IKEv2 VPN into our Windows client.
Importing the Certificate
From an elevated, administrative PowerShell terminal, execute the following command to import the X.509 machine certificate:
# elevated, administrative PS session
certutil.exe -f -importpfx .\vpnclient.p12 NoExportAfterwards, still operating in the elevated PowerShell terminal, run the following command to set a specific registry key for hardening the IKEv2 key exchange:
# elevated, administrative PS session
REG ADD HKLM\SYSTEM\CurrentControlSet\Services\RasMan\Parameters /v NegotiateDH2048_AES256 /t REG_DWORD /d 0x1 /fNow you can safely close the elevated PowerShell session.
Adding the VPN Connection
Proceed by opening a regular PowerShell session as your local, low-priv Windows user account. Within this PS terminal, you have to execute the following commands to create a VPN connection and define the IPSec connection:
# lowpriv powershell; add the IKEv2 VPN connection
powershell -command "Add-VpnConnection -ServerAddress 'vpn.example.com' -Name 'IKEVPN' -TunnelType IKEv2 -AuthenticationMethod MachineCertificate -EncryptionLevel Required -PassThru"

powershell -command "Set-VpnConnectionIPsecConfiguration -ConnectionName 'IKEVPN' -AuthenticationTransformConstants GCMAES128 -CipherTransformConstants GCMAES128 -EncryptionMethod AES256 -IntegrityCheckMethod SHA256 -PfsGroup None -DHGroup Group14 -PassThru -Force"-Name parameter. Also ensure that you define your server's public WAN IP address or DNS hostname at the parameter
-ServerAddress, where the Docker container runs.Testing the IKEv2 VPN
After successfully importing your IKEv2 client certificate as well as creating the actual VPN connection profile, you should be able to open Microsoft Windows' VPN network settings and confirm your newly added IKEv2 VPN profile.
Alternatively, if you use Windows 11, just click the taskbar's network icon, which will guide you to the available VPN profiles.
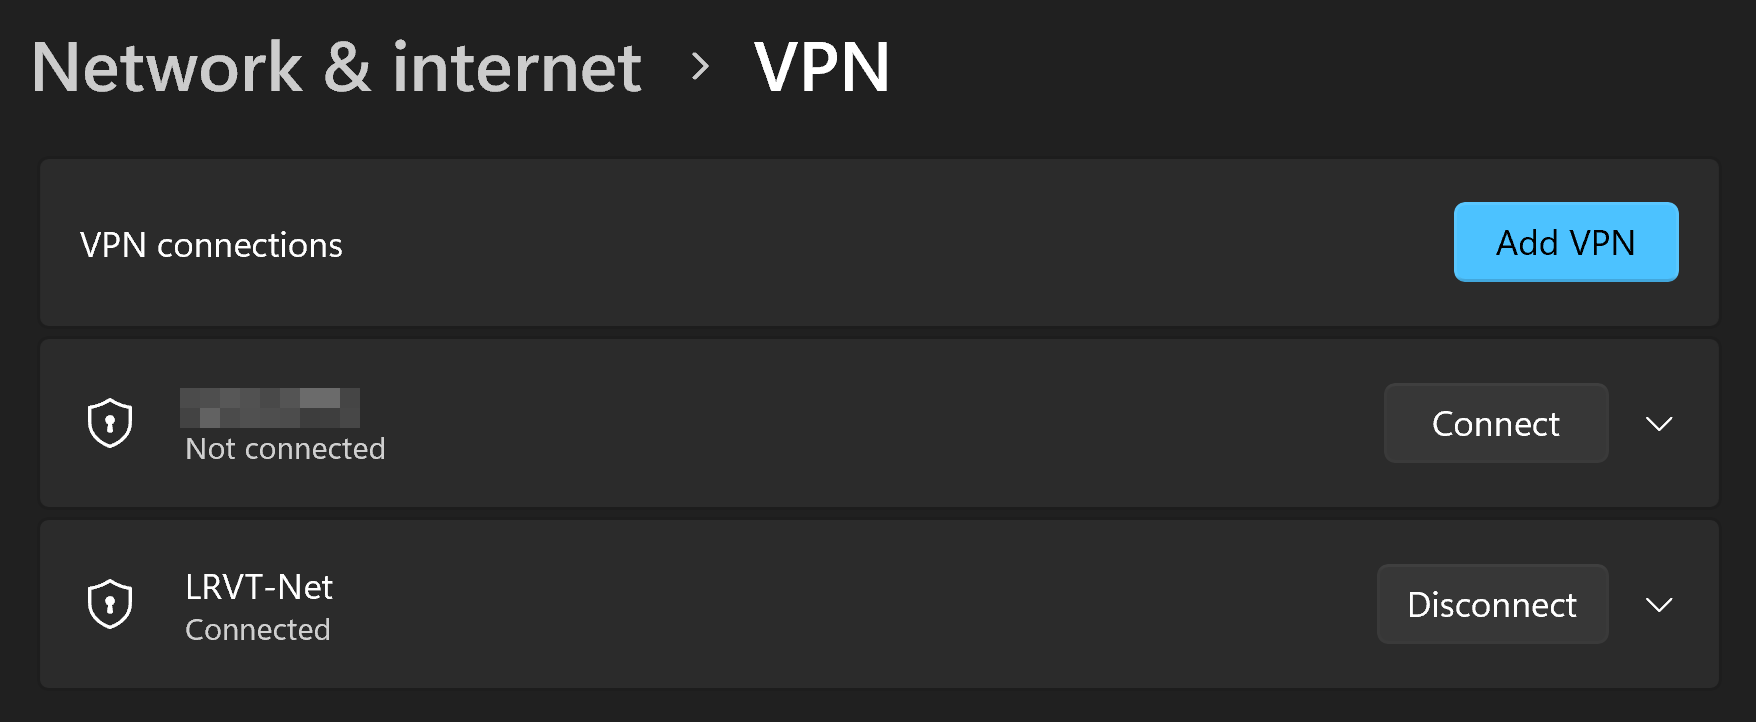
A simple click on Connect and you will be happily connected to your IKEv2 VPN server via a secure, encrypted and modern IPSec tunnel using IKEv2 only.
Verifying IKEv2 Only Mode
To verify that we are actually running an IKEv2 VPN service and not some older stuff like IKEv1 with an insecure aggressive mode, let's scan our server and containerized VPN network services on UDP/500 and UDP/4500.
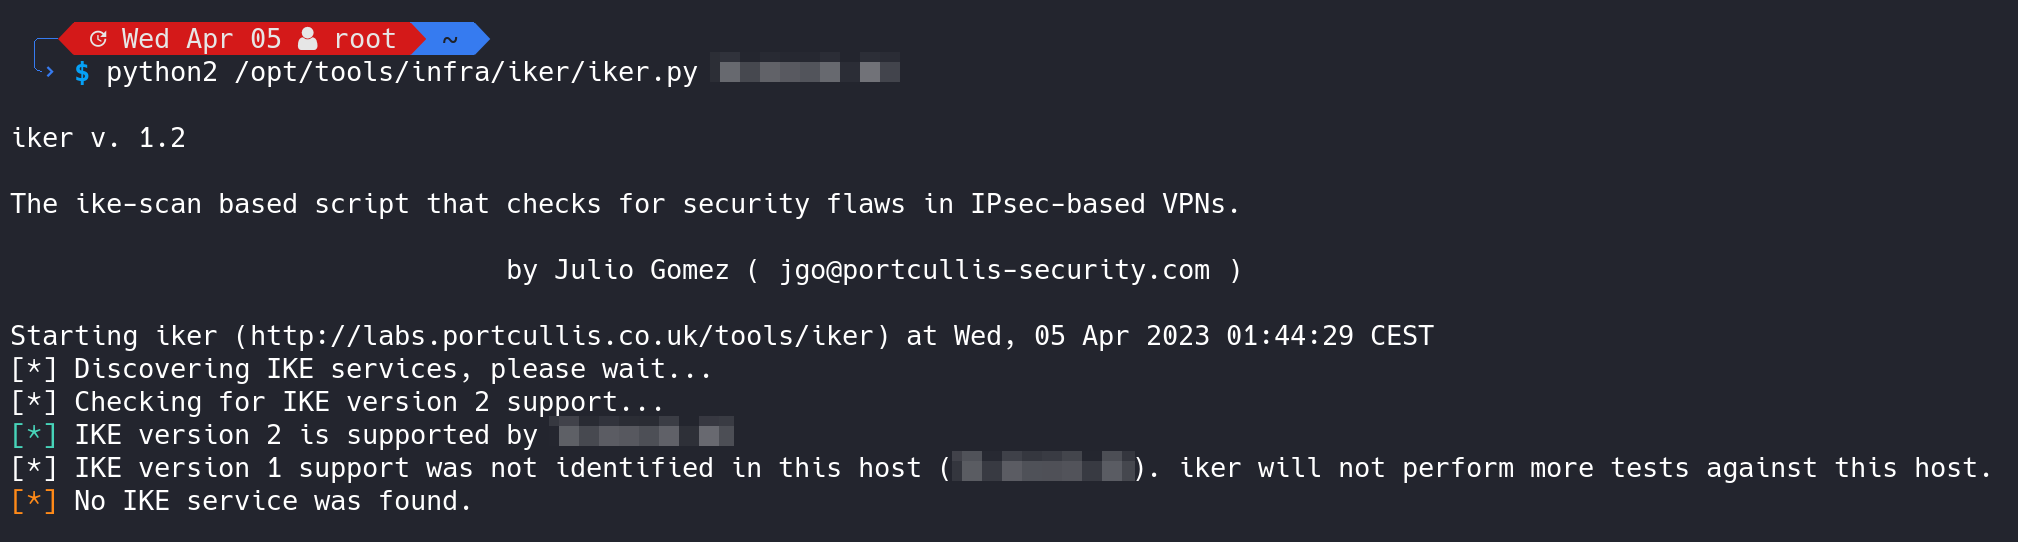
We can for example use a tool called iker (available here) to scan and audit our IKE VPN service via the following command:
sudo python2 iker <IP-OF-YOUR-IKE-SERVER>The output will confirm that only IKEv2 is available and that IKEv1 is disabled.
Alternatively, we can verify the same using the tool ike-scan and its commmands:
# this command should not yield any results, as IKEv1 is probed
ike-scan -M <IP-OF-YOUR-IKE-SERVER>

# this command should yield a result, as IKEv2 is probed
ike-scan -M -2 <IP-OF-YOUR-IKE-SERVER>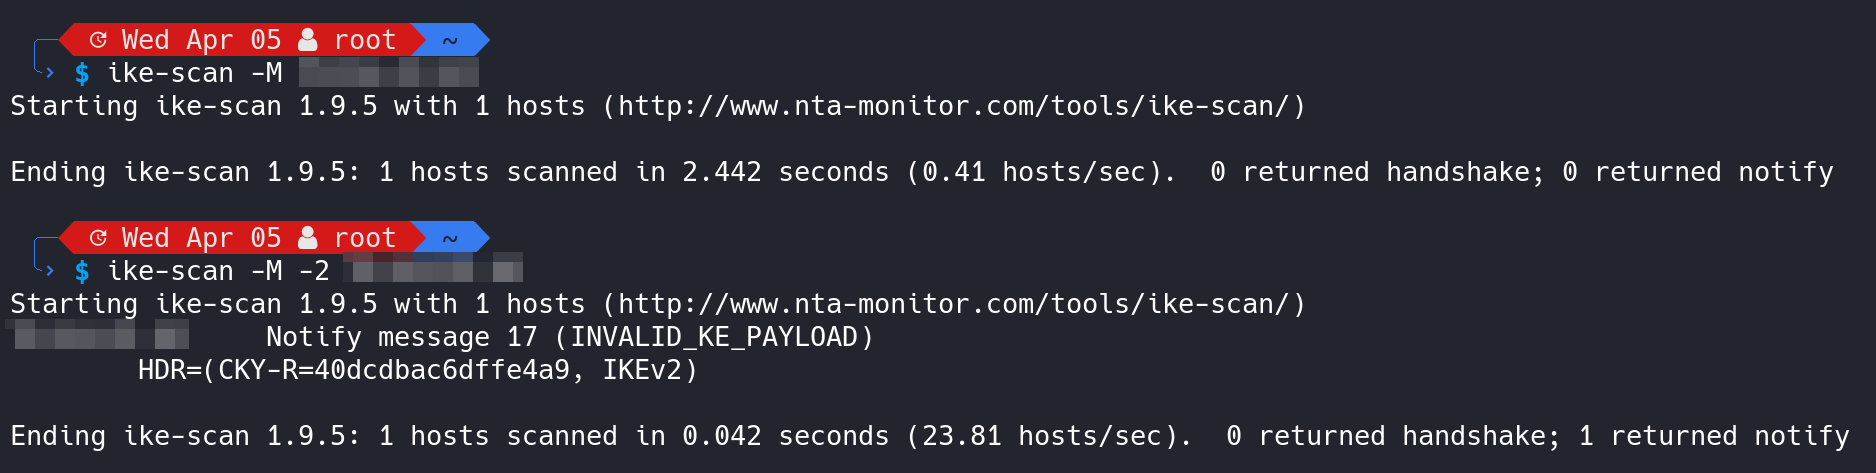
Final Words
By using a containzerized IKEv2 VPN we gained an easy and intuitive way of establishing a secure, encrypted connection from untrusted mediums to our own, privately operated server that is hopefully trusted.
By choosing IKEv2 and neglecting other open-source VPN softwares like OpenVPN or WireGuard, we obtained an easy way of connecting to one of our VPN servers via native Microsoft Windows board tools. No need for additional VPN clients to be installed.


Discussion